Excel 2003 Basics – Data Entry

A viewer wrote in to request a few videos that cover “The Basics” in Excel 2003. In this video lesson, I cover the basics of data entry.

Even if you have been using Excel for a number of years, I guarantee that you will pick up one or two tips in this video that will save you time and make you more productive.

Here are the steps to follow in this video lesson:

  1. Excel aligns “text” entries to the left-side of the cell. “Numeric” entries (including Dates & Times) are aligned to the right-side of the cell.
  2. All calculations in Excel MUST start with the =sign. This includes Formulas and Functions. Write formulas that refer to other cells. (Avoid writing formulas that only use constant values.)
  3. When we input data in a cell and press the ENTER key, Excel accepts the entry and makes the cell that is down one row in the column the “Active Cell.”
  4. To input data in the cells of the same row – and continue to use the ENTER key – first select the range of cells in the row.
  5. You can also select a range of cells in adjacent rows and columns. Excel goes down the cells in the column first and then moves automatically to the top row in the next column in your selection.

News! My DVD, “The 50 Best Tips for Excel 2007” is now availabe to purchase. I invite you to visit my online bookstore for more details.

Find the Excel Video Lesson that you want – Index to all Excel Topics

Share and Enjoy:
  • Add to favorites
  • Facebook
  • Twitter
  • Technorati
  • Print
  • email
  • Digg
  • StumbleUpon
  • del.icio.us
  • Yahoo! Buzz
  • Google Bookmarks
  • Orkut
  • SphereIt
  • Sphinn

Learn how Excel calculates time

Today’s lesson builds on the knowledge we gained in the prior video. So, rather than calculate “Dates”in Excel, we will calculate “Time.” Excel stores both Dates and Times as Serial numbers in a cell. This enables us to calculate the amount of time between two dates or two times.

Learning how to properly format the cells that calculate time is crucial to achieving correct results. It is also important to observe the proper syntax for entering times in cells (00:00:00 PM) or Hours: Minutes: Seconds AM or PM)

Here are the steps to follow in this Excel Video Lesson:

  1. Enter a Time function. e.g. =NOW() in a cell. Use the Keyboard Shortcut Ctrl+Shift+~ to reveal the serial number for that time.
  2. Excel counts time beginning at 12:00 AM or Midnight. So, the serial number for 6:00AM is 0.25
  3. If you only want to “Time Stamp” a cell, use the Keyboard Shortcut Ctrl+Shift+: (This entry will not update!)
  4. The =TIME() function requires three arguments (Hours, minutes, seconds)
  5. Be careful when performing calculations the show the difference between Start Time and End Time. If the End Time “spans midnight,” Excel will return an error unless…
  6. You use an =IF() Function in this calculation =IF(End_Time<Start_Time, End_Time+1, End_Time)-Start_Time
  7. To Increment a series of cells by 90 minutes use =Start_Time+TIME(1,30,0) and then copy the formula across the cells in the series.
  8. Formats matter! To correctly calculate hours that exceed 24 hours: Use this format – [h]:mm in the cell that contains the calculation.

Find the Excel Video Lesson that you want – Index to all Excel Topics

News! My DVD, “The 50 Best Tips for Excel 2007” is now availabe to purchase. I invite you to visit my online bookstore for more details.

Related Video Lessons

Share and Enjoy:
  • Add to favorites
  • Facebook
  • Twitter
  • Technorati
  • Print
  • email
  • Digg
  • StumbleUpon
  • del.icio.us
  • Yahoo! Buzz
  • Google Bookmarks
  • Orkut
  • SphereIt
  • Sphinn

My 50th Free Excel Training Video is On-line!

Wow! In just under two months’ time, I have posted 50 free Excel Training Videos!

I hope that you have been enjoying them half as much as I have in creating them. Please drop me an email – danny@thecompanyrocks.com – to give me your feedback. Tell me what you like. Tell me what you don’t like – and why not. And, also tell me what you would like to see more of (or less of, for that matter!)

I will answer your questions as quickly as possible. Either privately or in a public Excel Video training lesson (no names mentioned!)

To celebrate, this milestone, I have added a short ( 3 1/2 minute) video introduction to The Company Rocks Excels. I explain my training process and teaching style. I also – “hint, hint” – demonstrate how you will benefit when you engage me to train you and/or your staff!

I love training people to master the “Tips & Time-savers” in Excel! I would love to train you!

Please call me @ (310) 215-0678 or email me – danny@thecompanyrocks.com – so that I can start to design the best Excel training program to meet your present needs!

Thank you for your support.

Danny

News! My DVD, “The 50 Best Tips for Excel 2007” is now availabe to purchase. I invite you to visit my online bookstore for more details.

Share and Enjoy:
  • Add to favorites
  • Facebook
  • Twitter
  • Technorati
  • Print
  • email
  • Digg
  • StumbleUpon
  • del.icio.us
  • Yahoo! Buzz
  • Google Bookmarks
  • Orkut
  • SphereIt
  • Sphinn

Learn how Excel calculates dates

If you create invoices or track time-sheets, you use date calculations in Excel. If you earn interest from an investment or pay interest on a loan, you need to understand how Excel handles dates. Once you grasp the concept that a date is a serial number, then you will start to understand how spreadsheets calculate dates. In this lesson, Danny will demonstrate the key concepts that will enable you to work smarter when you use dates in Excel formulas.

These are the steps to follow in this video lesson:

  1. Dates, in Excel, are serial numbers. Serial number 1 is January 1, 1900. (Apple Macintosh computers use January 1, 1904 as serial number 1.)
  2. Use the Keyboard shortcut Ctrl+Shift+~ to reveal the serial number of any date.
  3. The =TODAY() function is very useful. It will update to reflect your system’s date. If you want to “date stamp” a cell, use the keyboard shortcut Ctrl+; to enter today’s date (this will not update)
  4. Many formulas use the =DATE() function. To understand this Function, experiment with the =YEAR(), =MONTH() and =DAY() functions. These functions are frequently used inside the =DATE() function.
  5. For the Formula =End_Date-Start_Date, decide if you worked, (earned interest, paid interest, etc.) on either date. If so, the formula is =End_Date-Start_Date+1
  6. To calculate the # of Years between dates use a formula like; =YEAR(C7)-YEAR(B7)
  7. Excel has a “secret” formula =DATEDIF() – you can not get help for this formula. Use it to determine a person’s age, e.g. =DATEDIF(B11, C11, “y”)
  8. To determine the “Day in the year” use this formula =B15-DATE(YEAR(B15), 1, 0) – where cell B15 contains the date that you want to use.
  9. To see how many day remain in the year, use this formula =DATE(YEAR(B19), 12, 31)-B19 – where cell B19 contains the date that you want to use.
  10. When you want to write a formula to increment cells by 1 month (assuming that the starting date will change, use this formula =DATE(YEAR(F16),MONTH(F16)+1,DAY(F16))
  11. When you want to write a formula to increment cells by 1 year (assuming that the starting date will change, use this formula =DATE(YEAR(F17)+1,MONTH(F17),DAY(F17))

If you have questions on this lesson, please send me an email danny@thecompanyrocks.com

Find the Excel Video Lesson that you want – Index to all Excel Topics

News! My DVD, “The 50 Best Tips for Excel 2007” is now availabe to purchase. I invite you to visit my online bookstore for more details.

Related Videos

Share and Enjoy:
  • Add to favorites
  • Facebook
  • Twitter
  • Technorati
  • Print
  • email
  • Digg
  • StumbleUpon
  • del.icio.us
  • Yahoo! Buzz
  • Google Bookmarks
  • Orkut
  • SphereIt
  • Sphinn

Paste Special Saves You Time – Explore Your Options

I love the Paste Special options in Excel (and Word and PowerPoint.) They save me time. They help to ensure that I am always referring to the latest data. And they help me to be more productive. What’s not to like?

In this video lesson, Danny will demonstrate how to get the most out of each Paste Special option.

Here are the steps to follow in this video lesson:

  1. When you want to copy the “results” of a formula and not the actual formula, choose “Edit, Paste Special, Values.”
  2. If you want to copy the “source formatting” as well as the Values, choose “Edit, Paste Special, Values and Number Formatting.”
  3. To change the orientation (from Vertical to Horizontal, e.g.) choose “Edit, Paste Special, Transpose.”
  4. To ensure that your copied data remains current, choose “Edit, Paste Special, Paste Link.”
  5. You can also use the Paste Special Dialog Box to choose Paste Special “Formats” and “Comments.”
  6. Experiment with Paste Special Add, Multiply, Subtract & Divide.

Find the Excel Training Video that you want – Index to all Excel Topics

News! My DVD, “The 50 Best Tips for Excel 2007” is now availabe to purchase. I invite you to visit my online bookstore for more details.

Related Videos

Share and Enjoy:
  • Add to favorites
  • Facebook
  • Twitter
  • Technorati
  • Print
  • email
  • Digg
  • StumbleUpon
  • del.icio.us
  • Yahoo! Buzz
  • Google Bookmarks
  • Orkut
  • SphereIt
  • Sphinn

Create a Calculated Field in Your Pivot Table

When someone wants to see an additional field in your Pivot Table – e.g. to show the “Price per Units Sold,” you create a “Calculated Field.” This is a fairly simple process. In this video, Danny will show you how. This is yet another example of how you can use the power of a Pivot Table to present data the way that you – or your audience – want to see it.

Here are the steps to follow in this lesson:

  1. On the Pivot Table drop-down menu select “Formulas, Calculated Field.”
  2. In the dialog box, write in a Name for your new Calculated Field.
  3. Enter the Formula. Use the Fields in your Pivot Table and any operators (+,-,*,/) Click OK.
  4. Use the Field Settings to change any formatting, etc.

Find the Excel Training Video you want

My DVD, “The 50 Best Tips for Excel 2007” is now availabe to purchase. I invite you to visit my online bookstore for more details.

Get a Free 28 Minute Excel Video Tutorial

Follow this link for information to download – “Introduction to Pivot Tables in Excel 2003”

Share and Enjoy:
  • Add to favorites
  • Facebook
  • Twitter
  • Technorati
  • Print
  • email
  • Digg
  • StumbleUpon
  • del.icio.us
  • Yahoo! Buzz
  • Google Bookmarks
  • Orkut
  • SphereIt
  • Sphinn

Use Pivot Tables to Summarize by Year, Quarter and Month

Can you imagine trying to use Excel Subtotals to summarize a long column sales – listed by date? What would you subtotal?  At every change in date?

This would be a nightmare! This would produce a useless report!

Pivot Tables, on the other hand, can provide a summary of dates by month, quarter, and year with just a few mouse clicks!

In this video lesson I show you how to produce that summary. The Pivot Table will transform a long list of data into information that you can use to analyze trends.

Here are the steps to follow in this lesson:

  1. Create a Pivot Table using all of the default settings. Drag the “Date” field into the ROW area and the “Sales” field into the DATA area of the Template.
  2. With 1 cell in the “Date” row selected, choose “Group & Show Detail, Group.” Select Year, Quarter and Month and click OK.
  3. You now have 3 ROWS in your Pivot Table – Year, Quarter & Month. Drag the Year field from the ROW up to the COLUMN area. Hide on of the “Grand Totals.”
  4. Click the Pivot Chart icon to create a Pivot Chart on a new worksheet. Filter the data fields.
  5. Move the Year field back to the Row area. Ungroup the fields to return to the starting point.
  6. To Group by WEEK: Choose “Group & Show Detail, Group” and select DAY. Then select 7 for the number of days in the week.

Find the Excel Training Video that you want – Index of all Excel Topics

Additional Pivot Table Resources

Pivot Table Training Resources

Pivot Table Training Resources

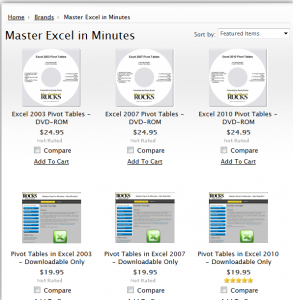
I have published a 90 minute focused video tutorial for Pivot Tables. It is available for each version of Excel -2010, 2007, and 2003. You can purchase it as either a DVD-ROM that I will ship to you or as a Downloadable version that you can work with immediately.

In addition to the 90 minutes of video instruction on Pivot Tables, the package includes:

  • The Excel Practice Files that I used while filming the video tutorial – so that you can practice your new skills using the same files that are on the video.

I invite you to visit my secure online shopping website – http://shop.thecompanyrocks.com – to learn about the many training resources that I offer for sale.

  • A Step-by-step Instructional Guide that you can print out – so that you can use it to take notes as you watch my video tutorial.

Related Video Lessons

Share and Enjoy:
  • Add to favorites
  • Facebook
  • Twitter
  • Technorati
  • Print
  • email
  • Digg
  • StumbleUpon
  • del.icio.us
  • Yahoo! Buzz
  • Google Bookmarks
  • Orkut
  • SphereIt
  • Sphinn

Hide and Show Details in Excel Pivot Tables

I continue to explore the many great features of Excel Pivot Tables. In this video lesson, I show you how to place fields in the PAGE area of the template; how to hide details in order to see the big picture and to reveal the hidden details in various formats. You will also learn how to automatically generate multiple pivot table reports!

Watch This Video on YouTube

Here is the link to watch this video tutorial on YouTube .

 Here are the steps to follow in this Excel video lesson:

  1. For this lesson I am moving the data sheet to a new workbook. Select Edit, Move or Copy Sheet (Click the “Copy” check box) and select “To a new workbook.
  2. Create the Pivot Table (Data, Pivot Table Report). In step 3, choose the “Layout” tab.
  3. On the Template, move “Territory” to the “Page” area; “Sales Reps” to the “Row” area; and move “YTD Sales” to the “Data” area twice. Click OK and then Finish.
  4. Rename the new worksheet – e.g. Pivot Table.
  5. Format the Numbers in the 1st Sum of YTD Sales Field – Right Mouse Click, choose Field Settings and the Number Tab.
  6. For the 2nd Sum of YTD Sales, Right Mouse Click, Field Settings and then “Options.” In the Options tab select “% of Total” from the drop-down “Show Data as:” box.
  7. Filter the Territories in the “Page” area.
  8. Move the Territories from the “Page” area to the “Row area.” You now have 2 Row Fields. Territory is the “Outer Row” and Sales Rep is “nested” as the “Inner Row.”
  9. Experiment with “Show Details” and “Hide Details” on the Pivot Table Toolbar.
  10. To create individual worksheets for the territories: Move Territory back to the Page area. From the drop-down options on the Tool Bar, select Show Pages.

NEW! My DVD Training Series, “The 50 Best Tips … ” is available for sale at the online store for The Company Rocks

Learn How to Quickly Create Pivot Tables – With Real World Business Examples!


Share and Enjoy:
  • Add to favorites
  • Facebook
  • Twitter
  • Technorati
  • Print
  • email
  • Digg
  • StumbleUpon
  • del.icio.us
  • Yahoo! Buzz
  • Google Bookmarks
  • Orkut
  • SphereIt
  • Sphinn

Introduction to Pivot Tables in Excel 2003

The majority of my clients have not yet used Pivot Tables. They are curious about them, but they are also afraid to get started with them on their own.

This is the first in a series of training videos designed to guide you in your discovery of Pivot Tables.

Here are the steps to follow in this video lesson:

  1. Start with an Excel data list that has clearly defined Column / Field Headers. With one cell active, Choose Data, Pivot Table Reports.
  2. You can accept all of the default settings to create a Pivot Table on a new worksheet.
  3. On the new worksheet you see: a) Floating Pivot Table Tool Bar b) Blank Pivot Table Template c) Pivot Table Field List
  4. Experiment by dragging & dropping Fields on to either the Row or the Column areas. Remember that Ctrl+Z (Undo) and Ctrl+Y (Redo) are handy tools to help you as you experiment with the layout that you want to see.
  5. To format numbers in Pivot Tables, double-click the “Sum of YTD Sales” header and in the dialog box select the Number tab to choose your format. This is different from the usual way you format cells. In Pivot Tables, you do NOT format numbers as cells. Rather you format the “Field Settings.”
  6. You can drop the YTD Sales into the Data area a second time. Then in Field Settings, choose a different Summarize by function – e.g. AVERAGE.

Free Excel 2003 Video Lesson, Workbook and Manual

 I invite you to download a free 28 minute Excel Video Tutorial, Workbook and Instructional Manual for Pivot Tables in Excel 2007 – Follow this Link to my WebEx by Cisco site.

Find the Excel Training Video that you want –

Index to all Excel Topics

My DVDs are now available for sale at my new online store !

Share and Enjoy:
  • Add to favorites
  • Facebook
  • Twitter
  • Technorati
  • Print
  • email
  • Digg
  • StumbleUpon
  • del.icio.us
  • Yahoo! Buzz
  • Google Bookmarks
  • Orkut
  • SphereIt
  • Sphinn

Keyboard Shortcuts – Part 2 – The Function Keys

We continue our series of lessons on Excel Keyboard shortcuts. In this video training, I demonstrate how each of the 12 Function keys serve as shortcuts.


The keyoard shotcuts that I use most frequently are:

  • F2 – to activate “in-cell” editing. Double-clicking a cell does the same thing – your choice!
  • F3 – To “paste a name” into a formula. (Of course you must have already created or defined named cells, ranges and constants for this to work.)
  • F5 – To go to any cell reference or named range. Explore the “Special” dialog box to “Go to” e.g. cells containing specific types of formulas – a great auditing feature!
  • f7 – To spell check you spreadsheet – great shortcut!
  • F11 – To insert a chart on a new worksheet with a 1-key shortcut. You can edit the chart once it is created.
  • F12 – Brings up the File, “Save As” dialog box – not many people know this shortcut.

Find the Excel Video Training Lesson that you want – Index to all Excel Topics

News! My DVD, “The 50 Best Tips for Excel 2007” is now availabe to purchase. I invite you to visit my online bookstore for more details.

Related Video Lessons

Share and Enjoy:
  • Add to favorites
  • Facebook
  • Twitter
  • Technorati
  • Print
  • email
  • Digg
  • StumbleUpon
  • del.icio.us
  • Yahoo! Buzz
  • Google Bookmarks
  • Orkut
  • SphereIt
  • Sphinn