How to Create a Series of 30 Minute Time Intervals in Excel

How Excel Stores TimeOne of my readers tracks data points at 30 minute (half-hour) periods throughout the day. He asked me for some help in streamlining this process.

AutoFill the Step-value for a Series

You can use AutoFill in Excel to create this series. Here are the steps to take:

  1. In two adjacent cells, enter the beginning time value and the time that is 30 minutes later than the beginning time value.
  2. Select BOTH cells and AutoFill the cells in the range that you want to “populate.”

Calculate Decimal Number that Represents 30 Minutes

You can calculate the numeric value for a half-hour (30 minute) period:

  1. Use a Formula to subtract the Start Time from the End Time.
  2. Format the result as a Number with 6 Decimal Places.

In this case, the result is: 0.020833 which you can use as a Constant Value in a Formula.

Keyboard Shortcut to Enter the Current Time

Ctrl + Shift + : (Colon) will “time stamp” a cell.

How Excel Stores Time

While you can Format Time in a variety of ways, Excel must be able to recognize and store Time entries as Numeric entries! This means that correctly entered times align to the right-side of the cell. Time values are stored as a “decimal part of one” day. For example, 12:00 PM (Noon) is stored as 0.50 – 50% of the day has elapsed

Shop at My Secure Online Website

I invite you to visit my secure online shopping website – http://shop.thecompanyrocks.com – to view all of the resources that I offer you to improve your Excel skills.

Watch Tutorial in High Definition

Click on this link to watch this Excel Tutorial in High Definition on my YouTube Channel – DannyRocksExcels

Share and Enjoy:
  • Add to favorites
  • Facebook
  • Twitter
  • Technorati
  • Print
  • email
  • Digg
  • StumbleUpon
  • del.icio.us
  • Yahoo! Buzz
  • Google Bookmarks
  • Orkut
  • SphereIt
  • Sphinn

Tips for Creating 52 Weeks of Employee Time Cards in Excel

Insert & Copy Worksheets

Insert & Copy Worksheets

We are now winding down the end of the year 2011. Several of my viewers and clients have asked my for help in creating one Excel Workbook that will contain 52 weeks of employee time card information:

  • Name and Department of Employee
  • Hours Worked each day of the week – Regular and Overtime
  • Number of Holiday / Sick Days that were used / that remain, etc.

First Tutorial in this Series

Rather than trying to create each individual – and some are very specific – request, I have decided to combine multiple requests into a series of Best Practice Tips for my general audience to consider.

In this lesson, I demonstrate:

  • Two methods for adding new blank worksheets to the Excel workbook
  • Two Methods for inserting an exact copy of an existing – and formatted – worksheet
  • My favorite tip – Fill Across Worksheets – either the formatting only, the contents only or the default setting – both formatting and contents.

Links to Additional Tutorials in this Series

Watch Tutorial In High Definition

Follow this link to watch this tutorial in High Definition on my YouTube Channel – DannyRocksExcels

Additional Resources at My Online Shopping Website

I invite you to visit my new – secure – online shopping website – http://shop.thecompanyrocks.com – and preview the many tutorials and resources that I offer you.

Watch Tutorial Now

Share and Enjoy:
  • Add to favorites
  • Facebook
  • Twitter
  • Technorati
  • Print
  • email
  • Digg
  • StumbleUpon
  • del.icio.us
  • Yahoo! Buzz
  • Google Bookmarks
  • Orkut
  • SphereIt
  • Sphinn

How to AutoFill the Letters in the Alphabet in Excel

 One of my viewers would like to be able to AutoFill the Letters in the Alphabet in his Excel Workbooks – he creates Alpha-Numeric Part Numbers for his products.

Two Ways to AutoFill Letters in the Alphabet

  1. Use a Formula – =CHAR(ROW(A65)) and AutoFill Down in the Column – This is not ideal
  2. Create and Use a Custom List in Excel. – So, use the Formula to create your list of 26 Alphabetical Letters. Copy the List and use Paste Special Values to convert the formulas to values. Then create your Custom List.

Using the CHAR() Function in Excel

There are 255 ASCI Characters that you can use in Formulas. For example, =CHAR(169) will return the © Symbol. In this lesson, I share a great Keyboard Shortcut that you can use to add this Symbol into the Footer of your printed Excel worksheet – Watch the video to discover this!

Visit My Secure Online Shopping Site

I hope that you take a few minutes to visit my new, secure online shopping website. The address is: http://shop.thecompanyrocks.com


Watch Tutorial in High Definition

On my YouTube Channel – DannyRocksExcels – I have posted this tutorial in High Definition Mode. Click here to go directly to this video.


Share and Enjoy:
  • Add to favorites
  • Facebook
  • Twitter
  • Technorati
  • Print
  • email
  • Digg
  • StumbleUpon
  • del.icio.us
  • Yahoo! Buzz
  • Google Bookmarks
  • Orkut
  • SphereIt
  • Sphinn

Tips to Help You Remain Productive When Upgrading to Excel 2007

Beginning Level Videos for Excel

Videos at the Beginning Level - 50 Best Tips for Excel

I enjoy participating in several discussion and sharing groups on LinkedIn. In one group, the question was raised, “The Ribbon – Love it or Leave it?” Many group members wrote to say that they just cannot figure out the new user interface – The Ribbon. Others expressed frustration that they were much less productive in their work as they tried to make the transition to either Excel 2007 or Excel 2010. Some said that they simply gave up and returned to using Excel 2003.

Certainly, I felt frustrated and lost when I first began to use Excel 2007. So, let me share my best tips for quickly adjusting to and mastering the commands and tools in Excel 2007 – and Excel 2010.

Topics Covered in this Video

  • The Office Button in Excel 2007 to open, save and print Excel workbooks and to change Excel Options
  • 7 Standard Tabs on the Ribbon
  • Groups of related Command Buttons
  • Launchers to open up Dialog Boxes
  • Command Buttons with Menus
  • Showing the Quick Access Toolbar below the Ribbon
  • Customizing the Quick Access Toolbar
  • Working with the Mini Toolbar

Watch Video in High Definition on YouTube

Follow this link to watch this Excel Video Tutorial in High Definition on my YouTube Channel – DannyRocksExcels

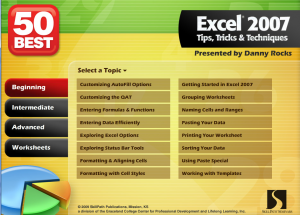
Purchase My DVD-ROM, “The 50 Best Tips for Excel 2007”

Here is the link to learn more about my best-selling DVD-ROM. You can purchase this from my online store using a secure shopping cart. On sale now for only $29.97 USD.


Share and Enjoy:
  • Add to favorites
  • Facebook
  • Twitter
  • Technorati
  • Print
  • email
  • Digg
  • StumbleUpon
  • del.icio.us
  • Yahoo! Buzz
  • Google Bookmarks
  • Orkut
  • SphereIt
  • Sphinn

How to Embed a PowerPoint Presentation on Your Blog or Website

I am really excited about the capabilities of the new WebApps available for Excel, Word and PowerPoint. While I have been using my Sky Drive on http://www.office.live.com for the past few months, I have just started to “embed” my Excel Workbooks and PowerPoint Presentations here on my website.

How to Embed PowerPoint Presentations on Website or Blog

As you will learn in the video tutorial, you need to follow these steps:

  1. Upload your PowerPoint Presentation to your Sky Drive via Windows Live! – www.office.live.com
  2. Set the properties for “Sharing” this presentation – e.g. View by All.
  3. Select the Presentation on your SkyDrive to open it online.
  4. Select the Title Bar for the Presentation to take you to the “Sharing Options” for the Presentation.
  5. When you select “Embed”, you will see a frame that hold the HTML Coding that you can copy. Copy this HTML Code.
  6. On your Blog or Website, open the HTML Editor for your new posting. Paste the HTML Code that you copied from your Sky Drive.

It is really easy!

Click on My Embedded PowerPoint Presentation

Here is my embedded presentation. You can advance the slides here on my website. You can also click the icon in the lower righ- hand corner to view the Presentation in full screen mode using your Internet Browser.

View This Video Tutorial in High Definition

Follow this link to watch this video tutorial in High Definition on my YouTube Channel – DannyRocksExcels

Share and Enjoy:
  • Add to favorites
  • Facebook
  • Twitter
  • Technorati
  • Print
  • email
  • Digg
  • StumbleUpon
  • del.icio.us
  • Yahoo! Buzz
  • Google Bookmarks
  • Orkut
  • SphereIt
  • Sphinn

Working with Custom Lists in All Versions of Excel

Edit Custom Lists in Excel

Edit Custom Lists in Excel

Custom Lists in Excel are great because the help to ensure accuracy and consistency when entering data on a worksheet. Excel comes with several Custom Lists built-in to the program – e.g. Days of the Week and Months of the Year. Now, you can quickly use Excel’s AutoFill handle to add Jan, Feb, Mar, Apr, etc. in any direction (vertical or horizontal) on the active worksheet.

Edit Custom Lists

You can quickly create – or edit – your own Custom List. Follow these steps:

  1. Type your list in a contiguous group of cells – either vertically or horizontally.
  2. Select the cells with the values that you just entered.
  3. Spell check this list – use the F7 Keyboard Shortcut
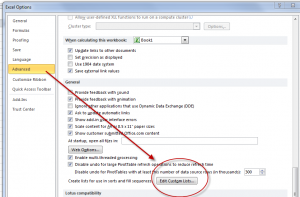
  4. Open up the Edit Custom List Dialog Box. (Watch this video to see how this is differs between Excel 2010, Excel 2007 and Excel 2003.)
  5. With your new Custom List selected, click the “Import” button to add your Custom List to the current version of Excel on this computer.

Sort Data Using a Custom List

On this video tutorial, I demonstrate how to sort a list of data using a Custom List – e.g. to get the “Month” field sorted in chronological order (January, February, etc.) This will save you a great deal of time!

Create a Custom List for Letters of Alphabet

Having a Custom List for the 26 letters of the alphabet comes in handy on many occasions. I show you how to AutoFill down the initial list using =Char(Row() + 64) beginning in Row 1 – a really usefuly function!

View This Excel Video Tutorial in High Definition

Follow this link to watch this video tutorial in High Definition on my YouTube Channel – DannyRocksExcels

Get my best-selling DVD-ROM, “The 50 Best Tips for Excel 2007” for only $29.97!

Share and Enjoy:
  • Add to favorites
  • Facebook
  • Twitter
  • Technorati
  • Print
  • email
  • Digg
  • StumbleUpon
  • del.icio.us
  • Yahoo! Buzz
  • Google Bookmarks
  • Orkut
  • SphereIt
  • Sphinn

Two Ways to Turn Excel Data On Its Side – Transpose the Data!

Transpose Excel Data

Transpose Excel Data

How many times have you spent an hour or more creating an Excel worksheet only to discover – or be told – that you have the wrong structure? The values that you entered run vertically down in Column A. And  now, you need to have your values run horizontally across in Row 1.

Well, don’t despair! And, most important, do NOT retype your entries on another worksheet. Rather,watch this video to see how to “Turn Excel Data On Its Side”:

  1. Select Transpose from the Paste Select dialog box or the right-click shortcut menu
  2. Use the =TRANSPOSE() Function which is an Array Function

Watch as I demonstrate the advantages of each approach – they are different! If you are “curious” about how an Array Function works, the TRANSPOSE Function is a good one to practice with.

Click this link to watch this video in High Definition on YouTube.

Now Using Excel 2010

I filmed this video using Excel 2010. I will use Excel 2010 for all future video lessons unless there is a particular need to use another version to illustrate a point.

Download Workbook Used in This Video

Click on this link to download the Excel Workbook that I used in this video tutorial. It is stored on my “SkyDrive” at www.office.live.com

Get my best-selling DVD-ROM, “The 50 Best Tips for Excel 2007” for only $29.97!

Share and Enjoy:
  • Add to favorites
  • Facebook
  • Twitter
  • Technorati
  • Print
  • email
  • Digg
  • StumbleUpon
  • del.icio.us
  • Yahoo! Buzz
  • Google Bookmarks
  • Orkut
  • SphereIt
  • Sphinn

How to Find and Delete Duplicate Records in Excel 2007

It is easy  – much too easy – to allow duplicate records to creep into an Excel database. Fortunately, starting in Excel 2007, it is really easy to first find and then delete duplicate records.

Remove DUplicate Records

Remove Duplicate Records

With the price of postage climbing, you cannot afford to send duplicate copies of a mailing piece. Not to mention that doing so reflects poorly on your company’s organizational skills. Likewise, having duplicate account entries makes for extra work and confusion.

Use Conditional Formatting to Highlight Duplicate Records

Starting in Excel 2007, Conditional Formatting got a lot easier to use. One of the menu selections is “Show Duplicate Records.” Now, with just a few mouse clicks, you can format the records that show duplicate values in your data set. I like to use this technique prior to acutally duplicating records so that I can get a sense of the number of possible duplicate records in my data set.

Selecting Duplicate Records to Delete

As a best practice, I always make a backup copy of my data set before I actually delete records. This way, I can quickly recover from any accidental deletions of non-duplicate records. When you choose the command to “Remove Duplicates,” a dialog box opens to reveal each field in your data set. Generally, you want to select all of the fields to narrow down the list of records to delete. Since I have already previewed the possible duplicate records by using Conditional Formatting, I have a pretty good idea of how many records will be deleted. You do not see a preview of the exact records that will be deleted, so make sure that you have a backup copy of your original list in order to restore any “accidental” deletions.

These new commands and menus introduced in Excel 2007 make deleting duplicate records a very quick process. Use them – wisely – to save yourself time, confusion and money!

Learn how to “Master Excel in Minutes – Not Months”

Watch this video lesson in High Definition, Full Screen mode. Follow this link to view this on my YouTube Channel – DannyRocksExcels

Secure Shopping Cart

Secure Shopping Cart

This is one of the tips that I offer on my DVD, “The 50 Best Tips for Excel 2007.” CLick here to open a secure shopping cart to purchase it.

Share and Enjoy:
  • Add to favorites
  • Facebook
  • Twitter
  • Technorati
  • Print
  • email
  • Digg
  • StumbleUpon
  • del.icio.us
  • Yahoo! Buzz
  • Google Bookmarks
  • Orkut
  • SphereIt
  • Sphinn

Get My New Popular Keyboard Shortcuts for Excel Chart – It’s Free When You Register

Click the link below to download my chart of Excel Keyboard Shortcuts as a PDF:
Excel Keyboard Shortcuts

Preview Excel Keyboard Shortcuts

 Hello and Welcome – to my new “Members Only” section of The Company Rocks website! 

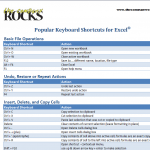
I just published a new five-page Chart – “Popular Keyboard Shortcuts for Excel.” It is free for you to download as a PDF. 

This, along with additional content, will soon be inlcuded in my new “Exclusive Membership Content” area on my website. 

My Exclusive Membership Site is not quite ready to launch. So, I am offering this chart for you to download as a PDF from this post. 

To get this chart, click on this link –  

CR – Updated Chart of Popular Excel Keyboard Shortcuts 

New! Download My Free 50 Minute Video Recording Demonstrating Excel Keyboard Shortcuts

Click this link to learn how you can download my new “extended length” video recording. It is “free of charge!”

I am proud of the way my Excel Keyboard Shortcuts Chart turned out – and I think that you will get a lot of value out of this free resource. I organized the Keyboard Shortcuts by the following Tasks:

Excel Keyboard Shortcuts

  • Basic File Operations
  • Undo, Restore or Repeat Actions
  • Insert, Delete, and Copy Cells
  • Edit Data
  • Show / Hide Columns and Rows
  • Select Contiguous Cells
  • Navigate Within a Worksheet
  • Navigate Between Workbooks
  • Find, Replace, and Go To
  • Enter Data
  • Work with Cell Comments
  • Work with Names for Cells and Ranges
  • Work with Formulas and Functions
  • Work with Formula Precedent and Dependent Cells
  • Print Worksheet
  • Formatting Cells and Text
  • Work with Subtotals and Outlines
  • Work with Tables, Lists, and Filters
  • Work with Charts
  • Work with Excel Windows and Open Applications

So, as you can see, this is a comprehensive – but not exhaustive – list of the best Keyboard Shortcuts for Excel. I took care to ensure that these Keyboard Shortcuts will work for all versions of Excel from 2003 through version 2010. 

The 50 Best Tips

The 50 Best Tips Series

I have several video lessons that cover keyboard shortcuts on my DVD-ROM, “The 50 Best Tips for Excel 2007.” It is a best-seller and it is now on sale! Use Coupon SAVE-20-PCT at checkout and save 20% on any puchase at my online store. Click here to open a secure shopping cart

And let me know your thoughts on my Excel Keyboard Shortcut Chart. Do you have a favorite Keyboard Shortcut that you want to share with our readers? Add your comments below.

Learn how to “Master Excel in Minutes – Not Months!”

Share and Enjoy:
  • Add to favorites
  • Facebook
  • Twitter
  • Technorati
  • Print
  • email
  • Digg
  • StumbleUpon
  • del.icio.us
  • Yahoo! Buzz
  • Google Bookmarks
  • Orkut
  • SphereIt
  • Sphinn

My Video Podcast has been downloaded 4,800 times

My iTunes Podcast

Danny on iTunes

OK, so let me brag a little. I launched my Video Podcast, “Danny Rocks Tips and Timesavers,” in June 2010 on iTunes. When I looked at the number of downloads and views, I was amazed to see that the number had surpassed 4,800 – I am thrilled.

Thank you for your support and encouragement. And, one viewer has reviewed my podcast:

Customer Reviews

Concise training      

by ChipAv

These are very specific and concise training modules on individual aspects of Excel and Powerpoint. (Also a few on meeting management and social media.) No nonsense, down-to-business, accurate, and professional. If one of these matches the skill you want to quickly acquire, you should like these.

I invite you to view, download, subscribe or review my video podcasts – either individually or as a whole. Here is the link to my iTunes video podcast:

http://itunes.apple.com/podcast/danny-rocks-excel-tips/id374923275 – If you like what you see, then pass this link on to a friend or colleague.

You can add your comments below and feel free to use one of the Social Media Icons at the bottom of this post.


Share and Enjoy:
  • Add to favorites
  • Facebook
  • Twitter
  • Technorati
  • Print
  • email
  • Digg
  • StumbleUpon
  • del.icio.us
  • Yahoo! Buzz
  • Google Bookmarks
  • Orkut
  • SphereIt
  • Sphinn