Still Using Excel 2003? Download My Video Tutorial Pivot Tables 2003 to Summarize, Analyze and Present Data

Video Tutorial for Excel 2003 Pivot Tables

Excel 2003 PivotTables Video

By popular demand, I have created an “Extended Length” ( 69 minutes) video tutorial in Excel 2003 that you can download – for US$9.95  “Create Pivot Tables in Excel 2003 toe Summarize, Analyze and Present the Information in Your Data.”

Quite a few of my customers and viewers are still using Excel 2003. Are you one of them? If so, this is welcome news for you! If you can even find a video tutorial for Excel 2003, chances are it was created “ages ago.” I incorporate current video technology to view online or to download  69 minute video tutorial that will teach you everything that you need to know to create, modify and present a PivotTable or PivotChart Report using Excel 2003.

What You Will Learn from this Video Recording

Here are the topics that I cover – each as an individual chapter on the recording:

  • Creating a PivotTable in Excel 2003
  • Filtering and Sorting Fields in an Excel 2003 Pivot Table
  • Refreshing your PivotTable; Changing the Source Data for your Excel 2003 PivotTable
  • Changing the Functions and Type of Calculations in your Excel 2003 PivotTable
  • Creating a Calculated Field in an Excel 2003 PivotTable
  • Grouping an Excel 2003 PivotTable Field (e.g. Month, Quarter, Year from a series of Daily Transactional Data)
  • Creating and Modifying and Excel 2003 PivotChart

Skip to Individual Chapters on the Video Recording

If you have ever purchased a recording of a “live” Excel Webinar, you know that one frustration is: “How do I get to the specific part of the recording that I want to learn or repeat?”

The last thing that I want you to worry about is “getting stuck” with watching my video recording from start to finish! NO! NO! NO!

That is why I recorded this video webinar with you in mind – I created an easy to follow Table of Contents on the recording so tht you can skip to or repeat an indivual chapter or starting point!

I am confident that you will enjoy this feature!

How to Get Started

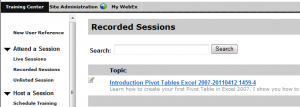
  1. Go to http://thecompanyrocks.webex.com and click on “Recorded Sessions” to see the list of all of my Recorded Video Lessons on WebEx by Cisco.
  2. Click on this link to open the Video Recording, “Excel 2003 Pivot Tables to Summarize and Analyze Data”
  3. Register for this recording (First Name, Last Name and email address) so that I can assist you quickly if you need help with downloading the recording or accessing the support materials.
  4. Enter your payment information US$9.95 using PayPal or a Credit Card – This is a SECURE WEBSITE.
  5. Download this video recording. I recommend that you: 
    1. Download the WebEx by Cisco ARF Recorder/ Player. Once you have opend the Video Recording, you can convert it to a different format (e.g. WMV (Windows Media), SWF (Flash Format) or MPEG4 (MP4 Format)
    2. Save the File to a Folder on your hard disk drive.
  6. Watch the video recording.

Download the Support Material for this Video Recording

Here is a link to the web page that I created for this video recording. Follow the hyperlinks to view online or download the Excel Workbook that I used in this recording as well as the Step-by-Step Instructional Manual that accompanies this recording.

Give Me Your Feedback

As I develop these “Extended Length” video recordings, I seek your feedback. Tell me what you liked. Tell me what you did not like – any why. Send me your suggestions for future topics for my video tutorial recordings.

Video Tutorials for Both Excel 2007 and Excel 2003

Many of my clients and viewers continue to use Office 2003 Programs (Excel 2003, Word 2003, PowerPoint 2003, etc.) and they have asked me to produce more video lessons that use these programs.

Finally, I have found the solution!

WebEx Recorded Sessions

WebEx Recorded Sessions

Extended Length Video Recordings on WebEx by Cisco

I have just started to create a series of extended length, in-depth instructional video tutorials as part of my “Master Business Skills in Minutes!” Series. I am making these recorded video lessons available on my WebEx by Cisco Systems website: http://thecompanyrocks.webex.com

My goal is to offer a “mix” of recorded video lessons where some are offered “free of charge,” while others will carry a modest fee. Each lesson that I publish will be offered in two versions – one for Office 2007 and a parallel version for Office 2003. Eventually, I will publish versions that use Office 2010.

Registration is Required – and Simple!

Each of the lessons – free or paid – will require you to register at WebEx before you can have access to download the video or to view it online. I have made the registration process as simple as possible: all that you need to supply is First Name, Last Name and a valid email address. That’s it! I value your privacy – click here to read or download the Privacy Policy for The Company Rocks.

Create a Pivot Table with Fewer than 10 Clicks of Your Mouse

Free Video Lessons on My Website, Video Podcast and YouTube

I will continue to post free Excel Video Lessons here on my website – www.thecompanyrocks.com and I will include links to my YouTube Channel – DannyRocksExcels  These videos will be short and focused – under 9 minutes!

What You Get with My WebEx Video Recordings

The videos that I publish at http://thecompanyrocks.webex.com -are designed to be longer than what I post here on my website or to YouTube. On the “extended length” videos, I will pay much more attention to the details and the “reasons why” aspects of the key steps. With WebEx, I can also offer you the opportunity to download the actual Excel Workbook that I used to create the lesson and give you a PDF of the “Step-by-step” instructions for each lesson.

I am excited about this new development. I want to hear what you think. Kindly add your comments and feedback in the section below this post.

Consolidate Data as a Quick Alternative to Subtotals

I have a great tip for you! When you need to produce a quick summary report of your data, use Consolidate in place of Subtotals. Here’s why:

  • You don’t have to sort the data when you consolidate.
  • You can use multiple functions (SUM, AVERAGE) in adjacent columns in your report.
  • You can easily copy and paste the Consolidated Summary Report to another workbook or into Word.

Watch this short video as I demonstrate how to use Data Consolidate in place of Subtotals.

Steps to follow in this lesson:

  1. Select an empty cell. Choose Data – Consolidate.
  2. In the dialog box, choose the Function that you want (SUM is the most common) and then select your data range (including the Column Headers) and click ADD.
  3. Be sure to check the Use Labels in “Top Row” and “Left Column.” Click OK
  4. A quirk – The Label for the Category does not appear when you Consolidate Data – Simply copy & paste it from cell A1.
  5. Repeat these steps to add an additional Function – e.g. AVERAGE to your Consolidation Report.
  6. Copy and paste the Consolidated Data to another workbook or to another application – e.g. MS Word.
  7. Contrast this quick alternative to creating Subtotals.
  8. The real “Time Saver” comes from the ability to quickly copy the Consolidated Summary.
  9. The “Gotcha” to remember with Subtotals is to choose “Edit – Go To – Special – Visible Cells Only” before you copy the Level 2 Subtotals. If you omit this step, you will discover that you have copied ALL of the data and not just the summary!

Find the Excel Training Video that you want – Click here for the Index to all Excel Topics

Learn how to “Master Excel in Minutes – Not Months!”

3 ways to minimize data entry errors in Excel

Excel is a great program for organizing and analyzing the information that you have in your system. But what if you have lots of data entry errors and inconsistencies?

In this Excel Training Video, I show you 3 ways to minimize data entry errors. You will learn how to employ Excel’s Data Validation feature to prevent accidental and intentional data entry errors!

These are the steps for this Excel Video Training Lesson:

  1. Choose the cell or range of cells that you want to apply Data Validation to.
  2. Select Data, Validation and start with the “Settings” tab.
  3. To control a range of dates, select “Date” in the Allow drop-down menu. Choose the range of dates that you wish to control. In this video I chose <= =TODAY()
  4. To create a “Pick from list” validation: 1st step is to create the list (in a separate workbook) and then “Name” the list. In the Allow menu, choose “List” and in the Source, use the F3 shortcut to paste in your named list.
  5. To prevent Duplicate entries, in the Allow menu choose “Custom” – This allows you to write a Formula. E.g. = COUNTIF($E$ :$E$30,E2)=1 where E2 is the 1st cell in your Validation range.
  6. In the “Error Alert” tab, you can pick from 3 different “Styles. Only the “Stop” style will prevent a data entry that violates your Data Validation rules. The other 2 styles are warnings and information – you can over-ride the validation rules with either of these 2 styles.

Find the Excel Training Video that you want – Index to all Excel Topics

News! My DVD, “The 50 Best Tips for Excel 2007” is now availabe to purchase. I invite you to visit my online bookstore for more details.