Learn How to Use Date Functions in Excel

Excel has a group of functions that help you to calculate dates. For example, the number of days between two dates or the date on which an invoice will be payable.

This is the second in my series of lessons where I demonstrate how to enter and calculate dates and times in Excel. Here is the link to part one.

Excel Tip List

Excel DVD Tips

The date functions that I demonstrate on this video are:

  • TODAY()
  • NOW()
  • DATE()
  • DATEVALUE()
  • WORKDAY()
  • NETWORKDAYS()
  • EOMONTH()

The last three date functions require you to activate the Analysis ToolPak Add-in. You will also learn some valuable and time saving keyboard shortcuts.

You can watch this video in High Definition, Full Screen Mode on my YouTube Channel – DannyRocksExcels

Learn how to “Master Excel in Minutes – Not Months!”
How to Use the Undocumented DATEDIF Function in Excel

Want to get in on a secret? The DATEDIF() Function is a well-kept secret in Excel. You will not find it in the list of Excel Functions. And, you will not find any documented Help for it from Microsoft! Amazing, because it is a great function to use. Be sure to bookmark this video, because this may be the only help that you get for the DATEDIF Function!

DATEDIF() has three required arguments: Start_Date, End_Date, Date Code.

Six Date Codes

  1. “Y” – Gives you the difference in “years” between the starting and ending dates.
  2. “M” – Gives you the difference in “months” between the starting and ending dates.
  3. “D” – Gives you the difference in “days” between the starting and ending dates.
  4. “YM” – Ignores the years and days to give you the difference in “months” between the starting and ending Months.
  5. “YD” – Ignores the years to give you the difference in “days” between the starting and ending Days and Months.
  6. “MD” – Ignores both the years and the months to give you the difference in “days” between the “day” of the Start_date and the “day” of the End_date.

You can add “clarifications” to the results by using the “&” (Ampersand) and a “text label.”

I use DATEDIF frequently – for example to find out a person’s exact age or to document the number of years an employee has been worked for you.

Follow this link to visit my Archive of  Video Lessons for Time and Date Functions in Excel

Click here to watch this Excel Video Lesson in High Definition, Full Screen Mode on YouTube.

Learn how to “Master Excel in Minutes – Not Months!”

Quickly Create a Series of Dates in Excel

In this lesson, I demonstrate two approaches to creating a series of dates in Excel:

  1. Use Excel’s AutoFill Options to drag your mouse to fill in the series. Be sure to use the “AutoFill Options” button when you release your mouse.
  2. Use an Excel Formula to increment the series of dates (by day, week, month, year, or even weekday.) This approach gives you the most flexibility if you will use a different starting date on copies of your worksheet.

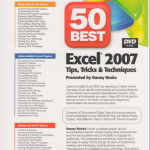
I devote several lessons to Excel date formulas and date formatting on my DVD, “The 50 Best Tips for Excel 2007.” Click here to add it to your shopping cart.

Lear how you can “Master Excel in Minutes – Not Months!”

Learn how Excel calculates dates

If you create invoices or track time-sheets, you use date calculations in Excel. If you earn interest from an investment or pay interest on a loan, you need to understand how Excel handles dates. Once you grasp the concept that a date is a serial number, then you will start to understand how spreadsheets calculate dates. In this lesson, Danny will demonstrate the key concepts that will enable you to work smarter when you use dates in Excel formulas.

These are the steps to follow in this video lesson:

  1. Dates, in Excel, are serial numbers. Serial number 1 is January 1, 1900. (Apple Macintosh computers use January 1, 1904 as serial number 1.)
  2. Use the Keyboard shortcut Ctrl+Shift+~ to reveal the serial number of any date.
  3. The =TODAY() function is very useful. It will update to reflect your system’s date. If you want to “date stamp” a cell, use the keyboard shortcut Ctrl+; to enter today’s date (this will not update)
  4. Many formulas use the =DATE() function. To understand this Function, experiment with the =YEAR(), =MONTH() and =DAY() functions. These functions are frequently used inside the =DATE() function.
  5. For the Formula =End_Date-Start_Date, decide if you worked, (earned interest, paid interest, etc.) on either date. If so, the formula is =End_Date-Start_Date+1
  6. To calculate the # of Years between dates use a formula like; =YEAR(C7)-YEAR(B7)
  7. Excel has a “secret” formula =DATEDIF() – you can not get help for this formula. Use it to determine a person’s age, e.g. =DATEDIF(B11, C11, “y”)
  8. To determine the “Day in the year” use this formula =B15-DATE(YEAR(B15), 1, 0) – where cell B15 contains the date that you want to use.
  9. To see how many day remain in the year, use this formula =DATE(YEAR(B19), 12, 31)-B19 – where cell B19 contains the date that you want to use.
  10. When you want to write a formula to increment cells by 1 month (assuming that the starting date will change, use this formula =DATE(YEAR(F16),MONTH(F16)+1,DAY(F16))
  11. When you want to write a formula to increment cells by 1 year (assuming that the starting date will change, use this formula =DATE(YEAR(F17)+1,MONTH(F17),DAY(F17))

If you have questions on this lesson, please send me an email danny@thecompanyrocks.com

Find the Excel Video Lesson that you want – Index to all Excel Topics

News! My DVD, “The 50 Best Tips for Excel 2007” is now availabe to purchase. I invite you to visit my online bookstore for more details.

Related Videos