Use an Excel Template to Customize a Worksheet with 52 Weeks of Employee Time Cards

Template for Time Cards in Excel

Time Card Templates in Excel

This is Part Two in my new series of Excel Tutorials where I share my best practice tips for creating 52 weeks of Employee Time Cards – for hours worked. In this segment, I focus on starting the process with an Excel Template.

Finding Templates for Time Cards

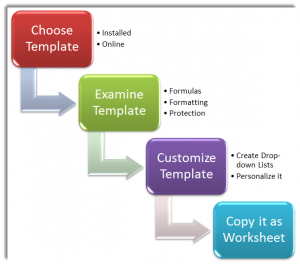
As I demonstrate in the video, there are at least two easy sources for finding a Time Card Template:

  1. Sample Templates Installed on your Computer
  2. Templates that you can preview and download from the Microsoft Office Templates Website

Examining Templates that You Download

Before you even think about duplicating the Excel Template that you just downloaded, it is important for you to take a few minutes to explore:

  • The Formulas used in the Template
  • The Formatting used in the Template – especially the formatting for Dates and Times
  • The Protection Applied (if any) to the cells or the entire worksheet

Creating Drop-down Menus for your Template

Since our premise here is that we will copy the template to 51 additional worksheets, it makes sense to use Data Validation to create a series of “drop-down menus” for Employee names and the Start Date for each week. I demonstrate how to do this in the video tutorial.

Links to Additional Video Tutorials in this Series

Additional Resources for Excel

I invite you to visit my new, secure, online shopping website – http://shop.thecompanyrocks.com – to discover the many training resources that I offer you!

Watch Tutorial in High Definition

Follow this link to watch this Excel Tutorial in High Definition on my YouTube Channel – DannyRocksExcels
Click to Watch Video Now

How to Calculate Overtime and Standard Hours Worked on a Time Card in Excel

One of my viewers asked me to show him how to calculate the number of hours worked each day – separated by standard hours and by overtime hours. He, like many Excel users, is frustrated when performing calculations involving time. They create a standard formula, but the results are not what they were expecting. In most cases, this is because of the need to FORMAT the cells that contain calculations to accommodate Excel’s logic.

Excel Time Card

Excel Time Card

Time Functions and Formats

In this lesson, I demonstrate the following functions and formats:

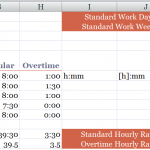
  • The =TIME() Function requires three arguments (Hours, Minutes, Seconds). In this example, I use =TIME(8,0,0) in a cell to represent the Standard Hours Worked each day – i.e. 8 hours.
  • The CUSTOM Format h:mm to format the cells that contain the results of time calculations (Total Hours Worked each day, Regular and Overtime Hours Worked each day).
  • The CUSTOM Format [h]:mm to format the cells that contain the results of SUM() for the Total Hours, Regular and Overtime Hours Worked each WEEK – i.e. Hours that exceed 24 hours
  • The Formula =SUM(Overtime Hours Worked this week) * 24 to gives me the NUMBER equivalent – Remember to format this cell as a NUMBER – not as [h]:mm,  so that you can multiply it by the cell that contains the Hourly Rate that you pay for either Regular Hours or Overtime Hours.

How Time is Stored vs. How Time is Displayed

Remember to distinguish between what Excel Stores as a calculation and how Excel Displays the result of a calculation. This is especially important with TIME and DATE Calculations in Excel.

You can view this lesson in High Defintion, Full Screen Mode on my YouTube Channel – DannyRocksExcels – by clicking this link.

I invite you to subscribe to my free Video Podcast – “Danny Rocks Tips and Timesavers”- at the iTune Store by clicking here.

Vist my Online Shopping Site

My DVD-ROM, “The 50 Best Tips for Excel 2007” is on sale at my Online Bookstore – http://shop.thecompanyrocks.com –  Click here to open a secure shopping cart.

Learn how to “Master Excel in Minutes – Not Months”