Refer to an Excel Table Field When Writing Formulas

Refer to Excel Table in Formula

Refer to Excel Table in Formula

While I strongly recommend creating “Named Ranges” that you can refer to in an Excel Formula, there is one drawback. By default, “named ranges” refer to “Absolute” Cells – e.g. $A$1:$A$15

However, what happens when your data set expands? For example, when you add records beyond row 15 in this case.  Now, your formulas do not refer to the additional data in each field. You need to find a way to automatically expand the range of cells that your formula refers to.

Tables in Excel 2007 and Excel 2010

Fortunately, if you are using either Excel 2007 or Excel 2010, you can “format” your data set as an EXCEL TABLE and take advantage of many great options:

  • When you append records (rows) , the definition of your Table automatically expands.
  • You can “name” your table to reflect its contents. For example, in this video I name my Table – DRTable –  and I refer to it in my formulas.

Writing Formulas that Refer to Excel Table Field

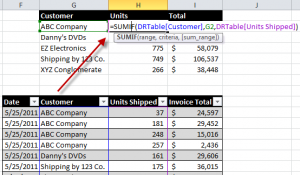
In this video tutorial I use the SUMIF Function. Remember that I have “named”my table DRTable. Here is how I begin my formula. =SUMIF(DRTable[Customer]. Notice the use of brackets ([ ]) around the [Customer] Field in the formula. This is the gotcha step in this lesson.

Watch This Video in High Definition on YouTube

I created this video tutorial in High Definition Mode. Click on this link to view it on my YouTube Channel – DannyRocksExcels

Get my best-selling DVD-ROM, “The 50 Best Tips for Excel 2007” – Visit my Online Bookstore for more information.
How to Maintain Accurate Subtotals When Your Data Set Expands in Size

Subtotal in Excel 2010 Table

Subtotal in Excel 2010 Table

This is Part 2 of my series of video tutorials demonstrating how to use the SUBTOTAL Function in Excel.

  • In Part 1, I showed you the value of using the Subtotal Function to summarize the results of applying a Data Filter to a range of cells.
  • In this part, I show you how to use an Excel 2007 or Excel 2010 Table to ensure that your Subtotal Formulas are automatically updated when you append records or add additional fields to your original data set.

I strongly recommend basing Filtered Lists and Pivot Tables on an Excel Table (in Excel 2007 or 2010) or an Excel List in Excel 2003. This way, any formulas, filters and references that you make will be automatically updated when you append additional records or otherwise change the structure of your data set.

Function Numbers 101 through 111

Notice that when you “toggle on” the Total Row for a Table or List that Excel uses this formula = SUBTOTAL(109, Table1, [Sales]). Function 109 will use the SUM Function(109) to total the values in the “Sales” field ([Sales]) of a Table named “Table1.” These Function Numbers + 100 were introduced in Excel 2003 and the are automatically applied whenever you are using a Total Row in an Excel Table.

I think that you will learn some cool tricks in this lesson. Let me know what you think!

Watch This Video in High Definition

Click on this link to watch this video tutorial in High Definition, Full Screen Mode on my YouTube Channel – DannyRocksExcels.

Invitation to Visit My New Online Shopping Site

I invite you to visit my new, secure online shopping website – http://shop.thecompanyrocks.com

Once there, you can get my best-selling DVD-ROM, “The 50 Best Tips for Excel 2007”

Create an Accounts Payable Summary Report in Excel

Accounts Payable Status Summary

Accounts Payable

Here is another video lesson that I created to answer a question from one of my viewers. In this case, the request is for help in creating an Accounts Payable Summary Report in Excel.

Formula to Create Label for Status

My viewer wants to know how to create one formula that will report the status of an Invoice as “Paid,” “Pay Now,” or “Delay.” To do this I “nested” one IF() formula inside another IF() formula. I used the ISBLANK() function as my first “logical test” in the formula. ISBLANK returns either TRUE or FALSE, so it is a good Function to become familiar with.

One of my “best practices” when learning how to “nest” IF Formulas, is to create each one separately – to test the results – and then copy and paste them into the combined formula.

Use SUMIF() Function to Total Status

Now, that your formula returns a status label for each invoice, you can use the SUMIF Function to search in the Named Range “Status” for the cells that match the criteria (Paid, Pay Now, Delay) and then Sum the Invoice Amounts for each category.

Watch This Video in High Definition on YouTube

Here is the link to my YouTube Channel, DannyRocksExcels, where you can watch this in High Definition.

Download this Excel Workbook

Follow this link to go to my Public SkyDrive to download this workbook to practice with.

How to Use SUMIF in Excel to Total Year-to-Date Sales

One of my viewers asked for my help to use the SUMIF Function in Excel to total Year-to-Date (YTD) Sales. Generally, the SUMIF Function is very easy to set up and use. However, when you need to refer to a “date” in the criteria argument, there is a “Got’cha” step.

How to Write the Formula for Year-to-Date Sales

=SUMIF(Date, “<=”&TODAY(), Sales) Notice how the <= comparison operator is enclosed within ” ” (Quotation Marks) and I use the & (ampersand) to join the TODAY() Function. Be careful when you write this fomula. In my experience, when I try to write THIS formula in the “Functions Argument” Dialog Box, I almost always get an Error Message.

Create and Use Named Cell Ranges in SUMIF Function

As a best practice, I encourage you to create and use “Named Cell Ranges” in your formulas. This is especially helpful with the SUMIF, SUMIFS, COUNTIF, COUTIFS functions because you are usually looking inside extensive ranges of data.

Another Way to Total Year-to-Date Sales

For many years, I did not realize that there was a SUMIF Function. So, I used to create an extra column and write to formulas to compute the YTD Sales. If you do want to or need to see YTD sales in each cell, I show you how to do this by writing just one formula.

Watch Lesson in High Definition

Follow this link to view this video lesson in High Definition on my YouTube Channel – DannyRocksExcels

Download My Free Video Lessons on Pivot Tables

Click here to learn about my 24 minute video recordings “Introducing Pivot Tables.” I have two versions – One for Excel 2003 and one for Excel 2007. I am offering both of them as a “free of charge” downloadable product!

Get My New Popular Keyboard Shortcuts for Excel Chart – It’s Free When You Register

Click the link below to download my chart of Excel Keyboard Shortcuts as a PDF:
Excel Keyboard Shortcuts

Preview Excel Keyboard Shortcuts

 Hello and Welcome – to my new “Members Only” section of The Company Rocks website! 

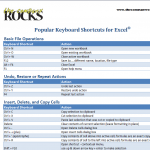
I just published a new five-page Chart – “Popular Keyboard Shortcuts for Excel.” It is free for you to download as a PDF. 

This, along with additional content, will soon be inlcuded in my new “Exclusive Membership Content” area on my website. 

My Exclusive Membership Site is not quite ready to launch. So, I am offering this chart for you to download as a PDF from this post. 

To get this chart, click on this link –  

CR – Updated Chart of Popular Excel Keyboard Shortcuts 

New! Download My Free 50 Minute Video Recording Demonstrating Excel Keyboard Shortcuts

Click this link to learn how you can download my new “extended length” video recording. It is “free of charge!”

I am proud of the way my Excel Keyboard Shortcuts Chart turned out – and I think that you will get a lot of value out of this free resource. I organized the Keyboard Shortcuts by the following Tasks:

Excel Keyboard Shortcuts

  • Basic File Operations
  • Undo, Restore or Repeat Actions
  • Insert, Delete, and Copy Cells
  • Edit Data
  • Show / Hide Columns and Rows
  • Select Contiguous Cells
  • Navigate Within a Worksheet
  • Navigate Between Workbooks
  • Find, Replace, and Go To
  • Enter Data
  • Work with Cell Comments
  • Work with Names for Cells and Ranges
  • Work with Formulas and Functions
  • Work with Formula Precedent and Dependent Cells
  • Print Worksheet
  • Formatting Cells and Text
  • Work with Subtotals and Outlines
  • Work with Tables, Lists, and Filters
  • Work with Charts
  • Work with Excel Windows and Open Applications

So, as you can see, this is a comprehensive – but not exhaustive – list of the best Keyboard Shortcuts for Excel. I took care to ensure that these Keyboard Shortcuts will work for all versions of Excel from 2003 through version 2010. 

The 50 Best Tips

The 50 Best Tips Series

I have several video lessons that cover keyboard shortcuts on my DVD-ROM, “The 50 Best Tips for Excel 2007.” It is a best-seller and it is now on sale! Use Coupon SAVE-20-PCT at checkout and save 20% on any puchase at my online store. Click here to open a secure shopping cart

And let me know your thoughts on my Excel Keyboard Shortcut Chart. Do you have a favorite Keyboard Shortcut that you want to share with our readers? Add your comments below.

Learn how to “Master Excel in Minutes – Not Months!”

How to Use Database Functions for Excel Tables and Lists

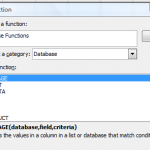
Database Functions include DSUM, DAVERAGE, DCOUNT. They are easy to use. You can use them with your Excel Tables and Lists. You use Database Functions to return the results (Sum, Average, Count, etc.) that you get from a Filter – or in this case, The Criteria.

Database Functions

Database Functions

Database Function Arguments

Each Database Function uses the same three required arguments:

  1.  
    1. Database. The Range that begins with your Data Set Labels and includes each column and each row in the database range. I prefer to use a “Named Range” for this argument.
  2. Field. The reference to the Field Label for the field that you wish to calculate (Sum, Count, Average, etc.) There are three ways to refer to this label: (Click on the cell with the label, use a column reference number (1,2,3, etc.) counting from Left to Right, type the “Label Name” inside ” ” quotation marks.
  3. Criteria. The Criteria Range that includes the Column Label for the criteria and the cells that contain the values or formulas you are using as your criteria.

It takes only a few minutes to set up your “Excel Dashboard” for the Criteria Range and your Results (e.g., the sum of the values in the field that match your criteria.) Change a value in your criteria and your results update automatically.

Filtering Data in Excel

If you use a structured data set in Excel, you probably use AutoFilters or Advanced Filters. Use Database Functions to “capture” the totals, averages, and counts of those queries.

If you need to review or learn how to apply Filters to data in Excel, watch these two lessons:

Click here to watch this video in High Definition at DannyRocksExcels on YouTube.

I invite you to shop for my DVD-ROM, “The 50 Best Tips for Excel 2007.” Click here to open a secure shopping cart.

Learn how to “Master Excel in Minutes – Not Months!”

How to Apply Criteria for Advanced Filters in Excel

You want to use Excel to do more than just store data. You want to use Excel Filters in order to get information from your data set. In order to Filter the data, you need to create and apply criteria.

Options for Filtering Data:

Advanced Filter Dialog Box

Advanced Filtering

  • Use the built-in AutoFilters – And, starting with Excel 2007 these include “Natural Language Filters!”
  • Use the Advanced Filter Dialog Box and your own Criteria Range – that is what I demonstrate in this lesson.

Now – since Excel 2007 – that the built-in filters include Date Filters, Text Filters and Number Filters, I do not use the Advanced Filter as much as in the past. However, there are at least two “must have” reasons to use Advanced Filters:

  1. To use “Calculated Field” criteria for your filters – e.g. to create a filter from a field that is not in your data set.
  2. To extract “Unique Records” that meet your criteria – and to copy them to another location.

I demonstrate both of these “must haves” in this video lesson.

How to Create an Advanced Filter

  1. Begin by inserting several blank rows above your Excel Data Set. These new rows will be used for your Criteria Range.
  2. Copy the Data Labels to the top row of your new Criteria Range. I like to link these with a formula – e.g. =A8 to maintain consistency with the Data Labels.
  3. Type or copy the values, comparison operators or formulas for your criteria in the row(s) below your criteria labels.
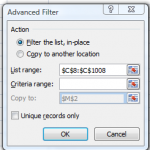
  4. Go to the Data Tab on the Ribbon and choose the Advanced Filter Command and use the Dialog Box Options.

Distinguish “OR” criteria from “AND” criteria

  • “OR” criteria use separate rows in your criteria range. You are selecting the records that match one OR more criteria.
  • “AND” criteria are written on the SAME ROW. You are filtering for records that match ALL the criteria on that row of your criteria range.

Computed Criteria in Filters

With Advanced Filters, you can use Computed Criteria for your filters. The formula must return a value that is either TRUE or FALSE. And the Label for your computed criteria CANNOT be the same as the labels in your data set.

In this lesson I show you how to filter for Invoices that have been paid – but paid “late” – after the “due date.”

Extract Unique Records with Advanced Filter

I show you how to copy the unique records – your list of customers – to a new worksheet. This is a great tip that I picked up by reading John Walkenbach’s books! Watch the video to see how this is done.

Watch My Video in High Definition

Click here to watch this video lesson in High Definition, Full Screen Mode on the DannyRocksExcels YouTube Channel.

Master Excel in Minutes Resources

I have created extended length video tutorials for Excel. I invite you to visit my online shopping website to: Learn how to “Master Excel in Minutes – Not Months!”

Use the SUMPRODUCT Function to Total Lists Using Multiple Criteria

In Excel 2007 and Excel 2010 you can use the new SUMIFS Function to total a list using multiple criteria. This is a great new feature!

But … what if you are using Excel 2003 or earlier? Or, if you collaborate with colleagues and clients who use older versions of Excel – how can you use multiple criteria to select the records that you want to Sum? You can use the SUMPRODUCT Function as I demonstrate in this video lesson.

The 50 Best Tips

The 50 Best Tips Series

Key Concepts

  • Create – and use – Named Cell References for Ranges / Arrays in your formulas
  • Use the Function Arguments Dialog Box – Use the keyboard shortcut Ctrl + A to bring this up
  • Use the F3 Keyboard Shortcut to bring up the Named Ranges List
  • In this lesson, use () to enclose each Array Argument
  • In this lesson, use * to substitute for the , to separate each Array in the formula (Edit this in the Formula Bar)

There are usually several ways to solve any problem in Excel. This is a good procedure to learn – regardless of the version of Excel that you use.

Click here to view the 1st part of this series on how to use the SUMPRODUCT Function in Excel.

You can view this Excel Video in Hig Definition, Full Screen Mode on my YouTube Channel – DannyRocksExcels by clicking here.

I cover the SUMIF and SUMIFS Functions in greater detail on my DVD, “The 50 Best Tips for Excel 2007.” Click here to start shopping using my secure shopping cart.

Learn how to “Master Excel in Minutes – Not Months!”

How to Use the SUMPRODUCT Function in Excel

In my experience, most Excel users are unfamiliar with the SUMPRODUCT Function. So let me give you two reasons to watch this short (5 minutes, 22 seconds) video lesson to learn how – any why – to use SUMPRODUCT:

  1. The SUMPRODUCT Function will speed up your calculations in Excel – get results with one step. With SUMPRODUCT() you can avoid several intermediary calculations.
  2. With SUMPRODUCT, you may be able to trim the size of your Excel worksheet. You may not need as many columns (fields) as you think to get the result that you need!

In this lesson, I show you how to calculate the Total Value of the Inventory (for a fictional company) with one formula!

50 Best Tips for Excel 2007

Excel Tips

Key Points Coverered

While the SUM Function “Adds Up” the values in the Arguments, the PRODUCT Function “Multiplies” the values in its Arguments.

  • Using “Arrays” in SUMPRODUCTS. In Excel 2007, you can use up to 255 Arrays! The key point is that all Arrays must be the same size and shape. For example, if the 1st arry in the Arguments is 15 rows in one vertical column, then all of the subsequent Arrays must be 15 rows in one vertical column.
  • I find that Creating – and Using – Names Cell Ranges for the Arrays will speed up writing the SUMPRODUCT formula.

I have decided to present the SUMPRODUCT Function in two lessons – so click on the sequel to see other uses for this function!

Click here to watch the 2nd video lesson on how to use the SUMPRODUCT Function in Excel.

You can watch this Excel Training Video Lesson in High Definition, Full Screen Mode on my YouTube Channel – DannyRocksExcels

You can learn how to “Master Excel in Minutes – Not Months!”

How to Speed Up Data Entry on Forms By Using Named Cell Ranges

You can speed up data entry on an Excel form by creating – and using – named cell ranges. This also improves data accuracy, because the data entry clerk only has to hit the “Enter” key after each imput; the curosor automatically moves to the next cell in the named range that you applied to your form!

There is one “got’cha” step in this process. As you will see in this video, it is important to observe the position of the “Active Cell” in your selection!

The 50 Best Tips

The 50 Best Tips Series

Key Points Covered

  • Hold down the “Ctrl” key as you click on the cells in your non-contiguous range.
  • Use labels and cell shading to identify the cells that require data input.
  • When selecting your non-contiguous cells, choose the cell that you want to be the “Active Cell” last.
  • You can enter a formula or value into all of the cells in a range with “Ctrl+Enter.”

Try this out  on a form that you use at work. Remember to create a “name” for your data input cells. “Named cell ranges” are saved when you create a copy of your workbook – so this technique can be easily duplicated by saving the file with a new name.

Click here to watch this video in High Definition, Full Screen Mode on my YouTube Channel – DannyRocksExcels

Learn how to “Master Excel in Minutes – Not Months!”