A viewer asked for my help in fixing a “Text” file that he imports into Excel each month. His IT department creates this file for him. The problem is that:
- The Field Header Labels are arranged on two rows – He needs all of the labels to be on one row.
- Each record is arranged on two rows – He needs each record to appear on one row.
- There is a blank row separating each record – He needs to remove all of the blank rows.
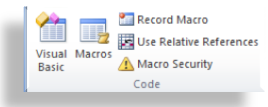
This is a perfect job for an Excel Macro!
In this tutorial, I first demonstrate how to create the Macro in Excel 2010. Then, I repeat the process using Excel 2003 – the version that my viewer is currently using.
Topics Covered in the Tutorial
- Adding the Developer Tab to the Ribbon in Excel 2010
- Creating back up copies of worksheets before recording the Macro
- Using the Fill Across Worksheets (Grouped) to copy both content and formatting
- Using Relative References when Recording a Macro
- Planning the steps you will take before Recording the Macro
- Using Keyboard Shortcuts to Run the Macro
- Creating and Editing a Command Button to Run the Macro
- Viewing the VBA Code that Excel creates when you Record the Macro
- Using Step Into to see how each step in the Macro is executed
- Viewing and Changing Security Settings for Macros
- Storing Macros in a Trusted Location (Excel 2007 and Excel 2010)
- Saving Worksheets that contain Macros in Excel 2007 and Excel 2010
Watch Tutorial in High Definition
Follow this link to view this Excel Tutorial in High Definition mode on my YouTube Channel – DannyRocksExcels.
Link to this post!

