How to Apply Alternate Row Shading Using Conditional Formatting in Excel

Alternate Row Shading

Alternate Row Shading w/ Conditional Formatting

This is the first tutorial in a new series. In collaboration with my good friend, Alan Friedman – CPA and partner with the firm Friedman, Kannenberg & Co., PC – I am using Alan’s Financial worksheets to demonstrate how to get the most out of Excel. In this lesson, I show you how to apply Alternate Row Shading – aka “Green Bar Shading” – to a Year-end Inventory Analysis Excel worksheet.

Conditional Formatting in Excel

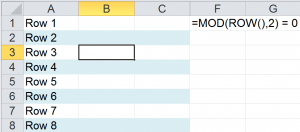
In this lesson, I create a new rule that uses a formula to determine the “condition” – or criteria – that must be met in order to apply the “formatting” to my selection of cells. The “key” to understanding this rule: The formula that you use for this “rule” must return either TRUE or FALSE. The cells – in the selection – that evaluate to TRUE will receive the special formatting – a background shading.

Extending Range of Cells to Receive Conditional Formatting

In general, you can use Excel’s AutoFill Handle to extend Conditional Formatting to adjacent cells. If, however, you want to apply the “Rule Using a Formula” to non-adjacent cells, first copy a cell that contains the Conditional Formatting. Then, use Paste Special – Formatting to apply this rule to your new selection of cells.

Resources for This Tutorial

I invite you to visit my secure online shopping website – http://shop.thecompanyrocks.com – to preview all of the resources that I offer to you.

Please visit the Friedman, Kanneberg & Co. website to download the worksheet used in this series of lessons – and other seminar handouts.


Watch Tutorial in High Definition

Follow this link to watch this Excel Tutorial in High Definition on my YouTube Channel – DannyRocksExcels
Play Video Now

Working with Custom Lists in All Versions of Excel

Edit Custom Lists in Excel

Edit Custom Lists in Excel

Custom Lists in Excel are great because the help to ensure accuracy and consistency when entering data on a worksheet. Excel comes with several Custom Lists built-in to the program – e.g. Days of the Week and Months of the Year. Now, you can quickly use Excel’s AutoFill handle to add Jan, Feb, Mar, Apr, etc. in any direction (vertical or horizontal) on the active worksheet.

Edit Custom Lists

You can quickly create – or edit – your own Custom List. Follow these steps:

  1. Type your list in a contiguous group of cells – either vertically or horizontally.
  2. Select the cells with the values that you just entered.
  3. Spell check this list – use the F7 Keyboard Shortcut
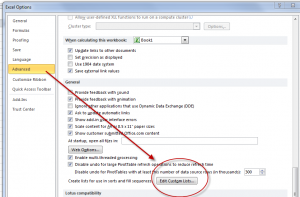
  4. Open up the Edit Custom List Dialog Box. (Watch this video to see how this is differs between Excel 2010, Excel 2007 and Excel 2003.)
  5. With your new Custom List selected, click the “Import” button to add your Custom List to the current version of Excel on this computer.

Sort Data Using a Custom List

On this video tutorial, I demonstrate how to sort a list of data using a Custom List – e.g. to get the “Month” field sorted in chronological order (January, February, etc.) This will save you a great deal of time!

Create a Custom List for Letters of Alphabet

Having a Custom List for the 26 letters of the alphabet comes in handy on many occasions. I show you how to AutoFill down the initial list using =Char(Row() + 64) beginning in Row 1 – a really usefuly function!

View This Excel Video Tutorial in High Definition

Follow this link to watch this video tutorial in High Definition on my YouTube Channel – DannyRocksExcels

Get my best-selling DVD-ROM, “The 50 Best Tips for Excel 2007” for only $29.97!